How to install a Nostr Relay
I’ve been diving into the Nostr protocol and the various clients that are being built on top of it. I wanted to a run a relay on the Nostr network and start experimenting with different apps and services I could build on it.
Nostr is an open-source, decentralized protocol used for creating censorship-resistant content. It’s primary use so far has been social media, but it can be used for private messaging, blogging, and classifieds. Its network runs on relays which can be setup and run by anyone. Here’s how I set up a nostr relay.
André Neves wrote an excellent that you can access here but I found a few things weren’t working for me. I then found this guide by massmux which filled in a couple of pieces for me. What’s below is how I combined these guides to setup the relay in about ten minutes.
I used massmux' fork for the relay client.
Setting up the VM
I used the setup from Neves. Using Digital Ocean I created a droplet with the following VM:
Ubuntu 22.10, 8GB memory, 160GB NVME SSDs
As noted, it’s unknown and not benchmarked what specs are ideal. I’ll run this current setup and check performance. Once the droplet is created, reserve a static IP for the droplet.
Point your relay domain to the VM
Go to the domain manager for the domain where you want to host the relay, and add an A record with the subdomain name pointing to the reserved IP for your droplet.
This maps the VM’s IP address to your subdomain.mydomain.com (in my case, it points to nostr.pcdkd.fyi).

Once you’ve completed these, steps, access the VM and follow the next steps (here’s whereI found massmux' guide more helpful).
CLI Commands
#update deps
sudo apt update

#install dependencies
sudo apt install nginx certbot python3-certbot-nginx ufw
sudo apt-get remove docker docker-engine docker.io containerd runc
sudo apt update

#install docker (ubuntu)
sudo apt-get install ca-certificates curl gnupg lsb-release
sudo mkdir -p /etc/apt/keyrings
curl -fsSL https://download.docker.com/linux/ubuntu/gpg | sudo gpg --dearmor -o /etc/apt/keyrings/docker.gpg
echo \
    "deb [arch=$(dpkg --print-architecture) signed-by=/etc/apt/keyrings/docker.gpg] https://download.docker.com/linux/ubuntu \
    $(lsb_release -cs) stable" | sudo tee /etc/apt/sources.list.d/docker.list > /dev/null
sudo chmod a+r /etc/apt/keyrings/docker.gpg
sudo apt-get update
sudo apt-get install docker-ce docker-ce-cli containerd.io docker-compose-plugin

#Clone nostr-relay repo
git clone https://github.com/Cameri/nostr-ts-relay.git

#Set up relay settings
cd nostr-ts-relay && mkdir ~/.nostr
cp settings.sample.json ~/.nostr/settings.json
You now need to configure the settings for the relay.
sudo vi ~/.nostr/settings.json
Update the info section at the top with your information. Here is what mine looked like for an example.
"info": {
    "relay_url": "wss://nostr.pcdkd.fyi",
    "name": "nostr.pcdkd.fyi",
    "description": "Nostr relay by pcdkd.fyi",
    "pubkey": "npub1w65mgf77dfnn9c2vylw8k0rjjvvc8cw60ttw44u2cf0608eyxtlsyt9ec3",
    "contact": "x@pcdkd.xyz"
  },
# [...]
Hit esc and then :x + enter to save the file in Vim.
Now it’s time to configure the nginx.
#Delete the default nginx settings file
sudo rm -f /etc/nginx/sites-available/default

#edit the file
sudo vi  /etc/nginx/sites-available/default
Add the following to the file and then save the file. Remember to update to your domain.
server{
    server_name subdomain.domain.com;
    location / {
        proxy_set_header X-Forwarded-For $proxy_add_x_forwarded_for;
        proxy_set_header Host $host;
        proxy_pass http://127.0.0.1:8008;
        proxy_http_version 1.1;
        proxy_set_header Upgrade $http_upgrade;
        proxy_set_header Connection "upgrade";
    }
}
Now restart nginx.
#Restart nginx
sudo service nginx restart
Now install the security certificate for the domain via LetsEncrypt. If you haven’t already pointed your subdomain a record to the VM IP, do it now.
#Request SSL cert from letsencrypt/certbot
sudo certbot --nginx -d subdomain.mydomain.com
Follow the prompts to install the certificate. Now restart again.
#Restart nginx
sudo service nginx restart

#Start the server
./scripts/start --detach
Once this completes, the server will be running.
In case you need to stop it, use:
./scripts/stop
For the firewall, add:
sudo ufw allow 22
sudo ufw allow 443
sudo ufw enable
Verify the relay
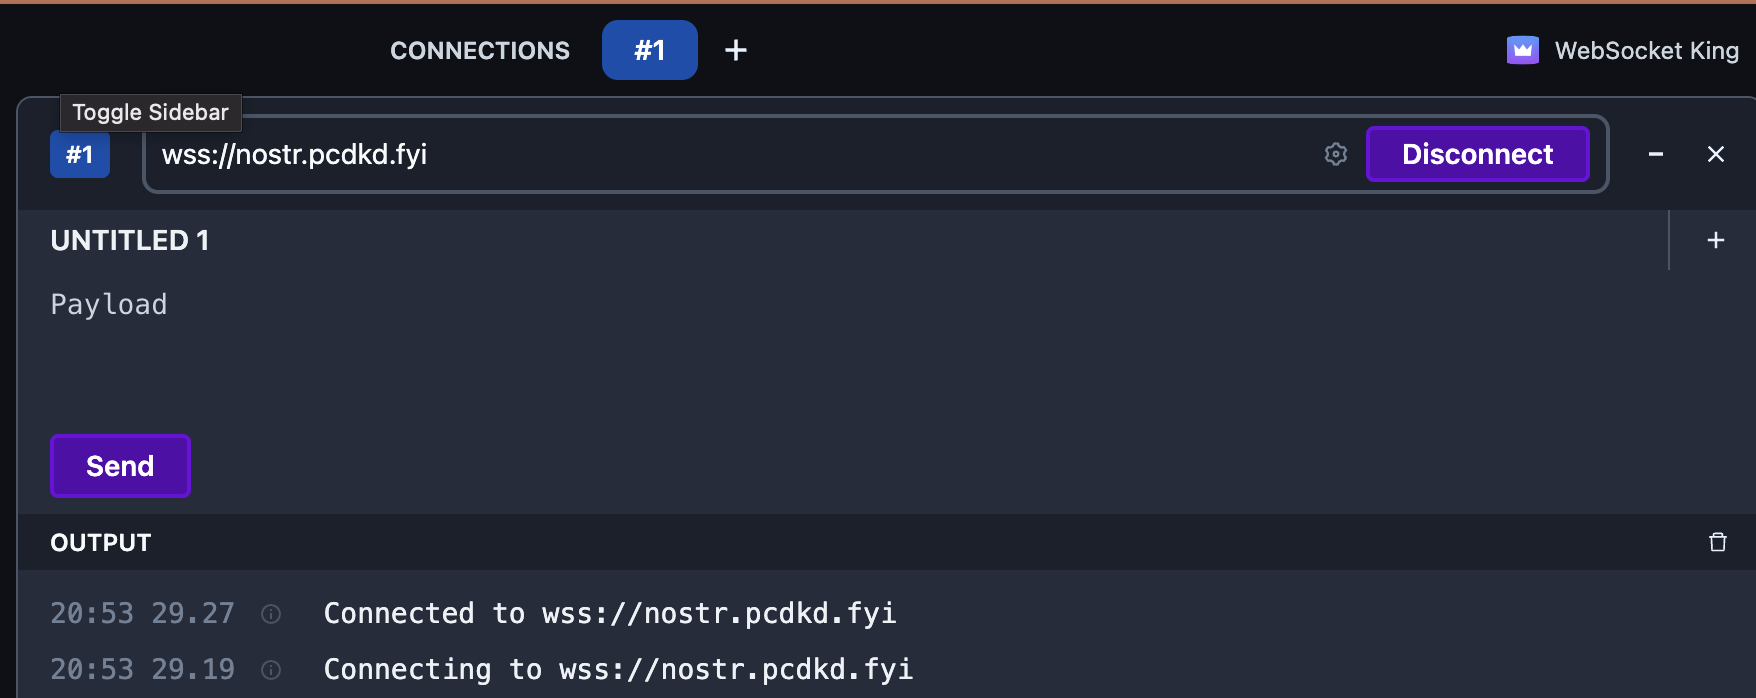
Go to websocketking.com, enter your relay subdomain and you should get:

Once the connection is confirmed, add your relay to a relay watch site. I added it to nostr.watch and you’ll be able to view it on the site (after your fork is pulled into the repo).
Your Nostr relay is now running.